I'd like to introduce Office365APIEditor for developers who create applications to work with Exchange Online or Office 365. Office365APIEditor is a sample tool that sends requests to various Office 365 related REST APIs. In this blog post, I'll show how to install the tool and how to use the two major functions.
Install
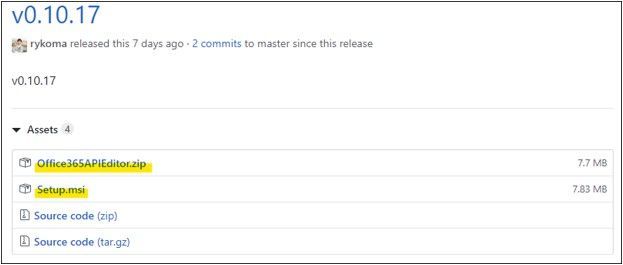
You can download the installer from GitHub’s releases page. There will be an installer version (Setup.msi) and a ZIP version (Office365APIEditor.zip) and both have the same functions. We recommend the installer version since it is easier to upgrade.
If you use the installer version, run Setup.msi and install the tool. If you use the ZIP version, extract Office365APIEditor.zip and run Office365APIEditor.exe. If you see a warning message from an antivirus product such as Windows Defender, be sure to read and understand any warning messages before you proceed.
When you run Office365APIEditor it will start in Mailbox Viewer mode.
In Mailbox Viewer mode, you can browse your mailbox contents such as folders, items, and mailbox properties using Outlook REST API. The only thing you need to have access to is a mailbox hosted on Exchange Online or Outlook.com.
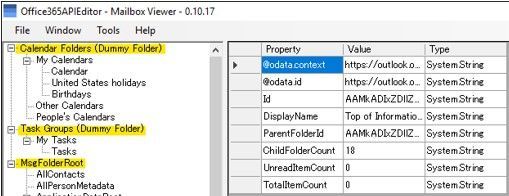
Click [File] - [New session]. Click on [Use the built-in application] and you will be prompted for credentials. Sign-in using your mailbox’s credentials. When sign-in is successful, you'll see three root folders in the left pane as shown below:
Outlook REST API does not have a folder hierarchy structure for Calendar and Task folders. Calendar folders belong to the calendar group, and Task folders belong to the Task group. Calendar groups and Task groups are listed under each dummy root folders. Mail and Contact folders are displayed under MsgFolderRoot tree. If you select a folder from the trees, the folder properties will be shown in the center pane; double-clicking a folder will pop-up a new window and the content of the folder will be shown.
By clicking [Window] - [New Message], you can open a mail compose window to send a message. And by clicking [Window] - [Focused Inbox Overrides], you can edit the Focused Inbox setting. Moreover, a token viewer window will open by clicking [Tools] - [Generic Token Viewer]. You can use the token viewer as JWT token decoder.
Editor mode
In Editor mode, you can send requests to APIs such as Microsoft Graph. Not only Microsoft Graph, but also Outlook REST API and Office 365 Management Activity API are also supported. Here are step-by-step instructions:
Launch Office365APIEditor and click [Tools] - [New Editor].
Click [File] - [New Access Token] on the Editor window.
If you already have an application registered in Azure Active Directory and you want to use that, click [v1.0 Endpoint] or [v2.0 Endpoint] and proceed with the wizard. In this instruction, click [I have not registered the application] because we use the built-in application ID.
Select [Office365APIEditor built-in application]
Click [Scope editor] to choose scopes.
If you are familiar with Microsoft identity platform, choose the scopes you need using the Scope Editor window. If you just want to try the fundamental features, click [Select default values], and basic scopes for mail, calendar, contact, etc. will be selected.
Proceed with the wizard and sign-in using your Office 365 credentials. You'll return to the Editor mode window once you are signed in.
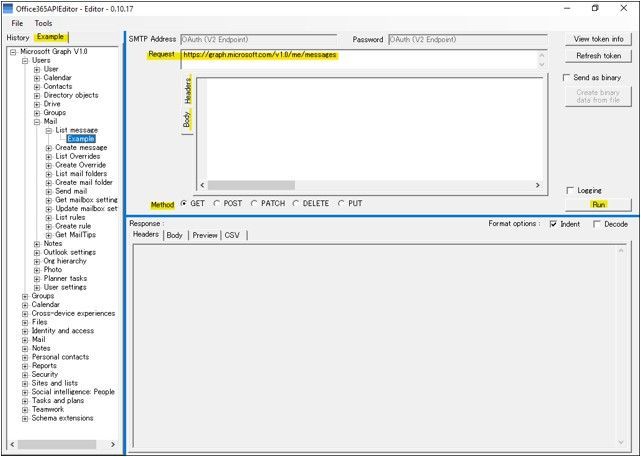
Type a request you want to execute in [Request] and select a HTTP method from [Method]. If necessary, edit [Body] and [Headers] as well. You can also select a Microsoft Graph sample request from [Example] tab. You do not need to type-in anything for Authorization header because Office365APIEditor will fill it out for you.
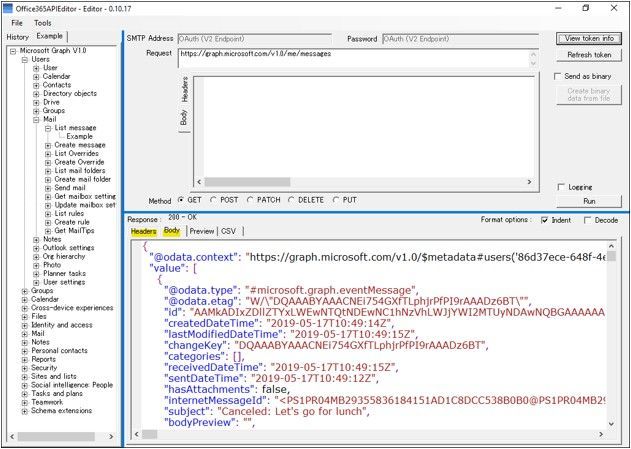
Click [Run]. The response will be displayed in [Headers] and [Body]. If you have requested a profile photo using Photo API, the photo will be displayed in [Preview] tab. If you have requested a report using Report API, the report will be displayed in [CSV] tab. You need to enable [Tools] - [Option] - [Allow auto redirect] to use this feature.


No comments:
Post a Comment
Use at your own risk.